

Thank you
I would like to extend my many many thanks to Epson Australia for having met with me at Epson’s demo facility at Macquarie Park in Sydney.
Introduction
When Epson announced the LS12000, I must admit I was kind of ticked off! Epson has been making high-powered laser projectors for many years now. In fact, I can’t think of any other company that is mass-producing both lamp-based and laser-based projectors at this scale.
So when they announced the LS12000 with the same brightness as the lamp-based TW9400 / UB5050 / UB6050 units and seemingly “just put a laser where the lamp was”, I was less than impressed. After all, it wouldn’t have been hard to at least throw us a bone and bump it upto 3000 lumens. Considering Epson’s experience with laser, it could have been done while having their morning coffees.
Of course, Epson Australia filled me in, that the LS12000 is a big improvement over the TW9400 as they were pre-viewing the two projectors side by side just a couple of weeks back here in Sydney. Epson Australia said the image quality difference was clearly visible between the two units.
However, I was still curious to see Epson’s updated pro-install-focused PU line. On the lower end, the PU1006 provides 6000 lumens – more than double that of the LS12000 while keeping the price around the same – with the cheapest lens option. The models above that increase that lumens to 7000, 8500 and 10 000 lumens.
The unit we were shown was the PU1008 with 8500 lumens. The demo facility didn’t have full light control. However, it was a cloudy day, the shades were drawn and lights were switched off which allowed us to have a feel for what the projector could do.
Unfortunately, I didn’t have enough time to take measurements. Epson Australia already had the unit running when we arrived, playing Avengers Infinity War in UHD HDR from an Oppo UDP-205. Also, I was allowed to go through a few scenes from Passengers, Aquaman – both on UHD Blu Ray – and iRobot on SDR 1080p Blu Ray.

Features
This is a large venue projector, which means it has heaps of features home cinema enthusiasts don’t and should not care about. The image can be manipulated to get a square image no matter at what angle and how the projector is installed – of course at the cost of pixels and image sharpness. It can also be stacked with other units side to side or by overlapping without the help of a PC in case 6000 – 10 000 lumens is not going to cut it – while also gaining pixels and I would imagine image sharpness.
However, what interested me were the features that the PU line has gained from Epson’s home theatre line-up, namely:
- 4K input and 4K enhancement using pixel shifting (not new this year but is a critical component)
- Improved contrast ratio compared to previous pro line-up
- UHD HDR playback which is brand new for the pro line-up
- Scene Adaptive Gamma – new across the whole range
You can view the full feature set on Epson’s product page for the PU1008.
Overall Image Quality
It is incredibly difficult to judge image quality in a non-perfect room and unfortunately Epson Australia wasn’t keen for these demo units to leave their facility at this time.
However, the first thing that jumps out at you is that the PU1008 is bright, and projected a very watchable image even with the lights on.
At the same time, immediately apparent to me was that the PU1008 was not going to replace either the TW9400 or the new LS12000 in a dedicated home theatre. The reason for this is multi-faceted, but what it boils down to is image processing and fine detail retrieval.
Having said that, if you were simply sitting back on the couch, you might have marvelled at the image presented in UHD HDR as the Aquaman disc was running. And then it clicked: this projector is likely perfect for mixed use applications. The gap between a dedicated home cinema projector and a professional large venue projector is that much smaller with this line. This unit can definitely project an incredibly convincing movie experience for venues where this is a secondary task. If set up correctly and projecting onto a grey screen, in a room with great light control, it could most likely project a beautiful and captivating image. Just look at the shot below from Aquaman.
Brightness
Two laser banks = lots of brightness. This projector has a LOT of brightness, no doubt about it. Thankfully, the PU series is also very versatile in that the laser light can be dimmed in 1% increments down to 30% as its minimum. That gives a huge range and flexibility in setup.
Contrast
Epson quotes the native on/off contrast of the projector at 2000:1 compared to around 4000:1 for the 9400 / 5050 / 6050. However, what you need to consider is the laser dimming function, which seemed to work very well in terms of darkening dark scenes. Even though we didn’t have full light control, turning on laser dimming at the beginning of Passangers as the spaceship is flying through space, the laser dimmed the image down considerably from 100%. I wish we had enough time to do some measurements – and I wish I had the unit in my own home cinema for a complete lights out experience. But we could certainly see the laser doing its work to keep blacks dark and dim the image as much as possible for low APL scenes. It wasn’t at all subtle.
I would actually recommend this projector to be paired with a grey screen, especially if a venue is planning to use this projector for movies. This will increase the perception of contrast even with some ambient light in the room.
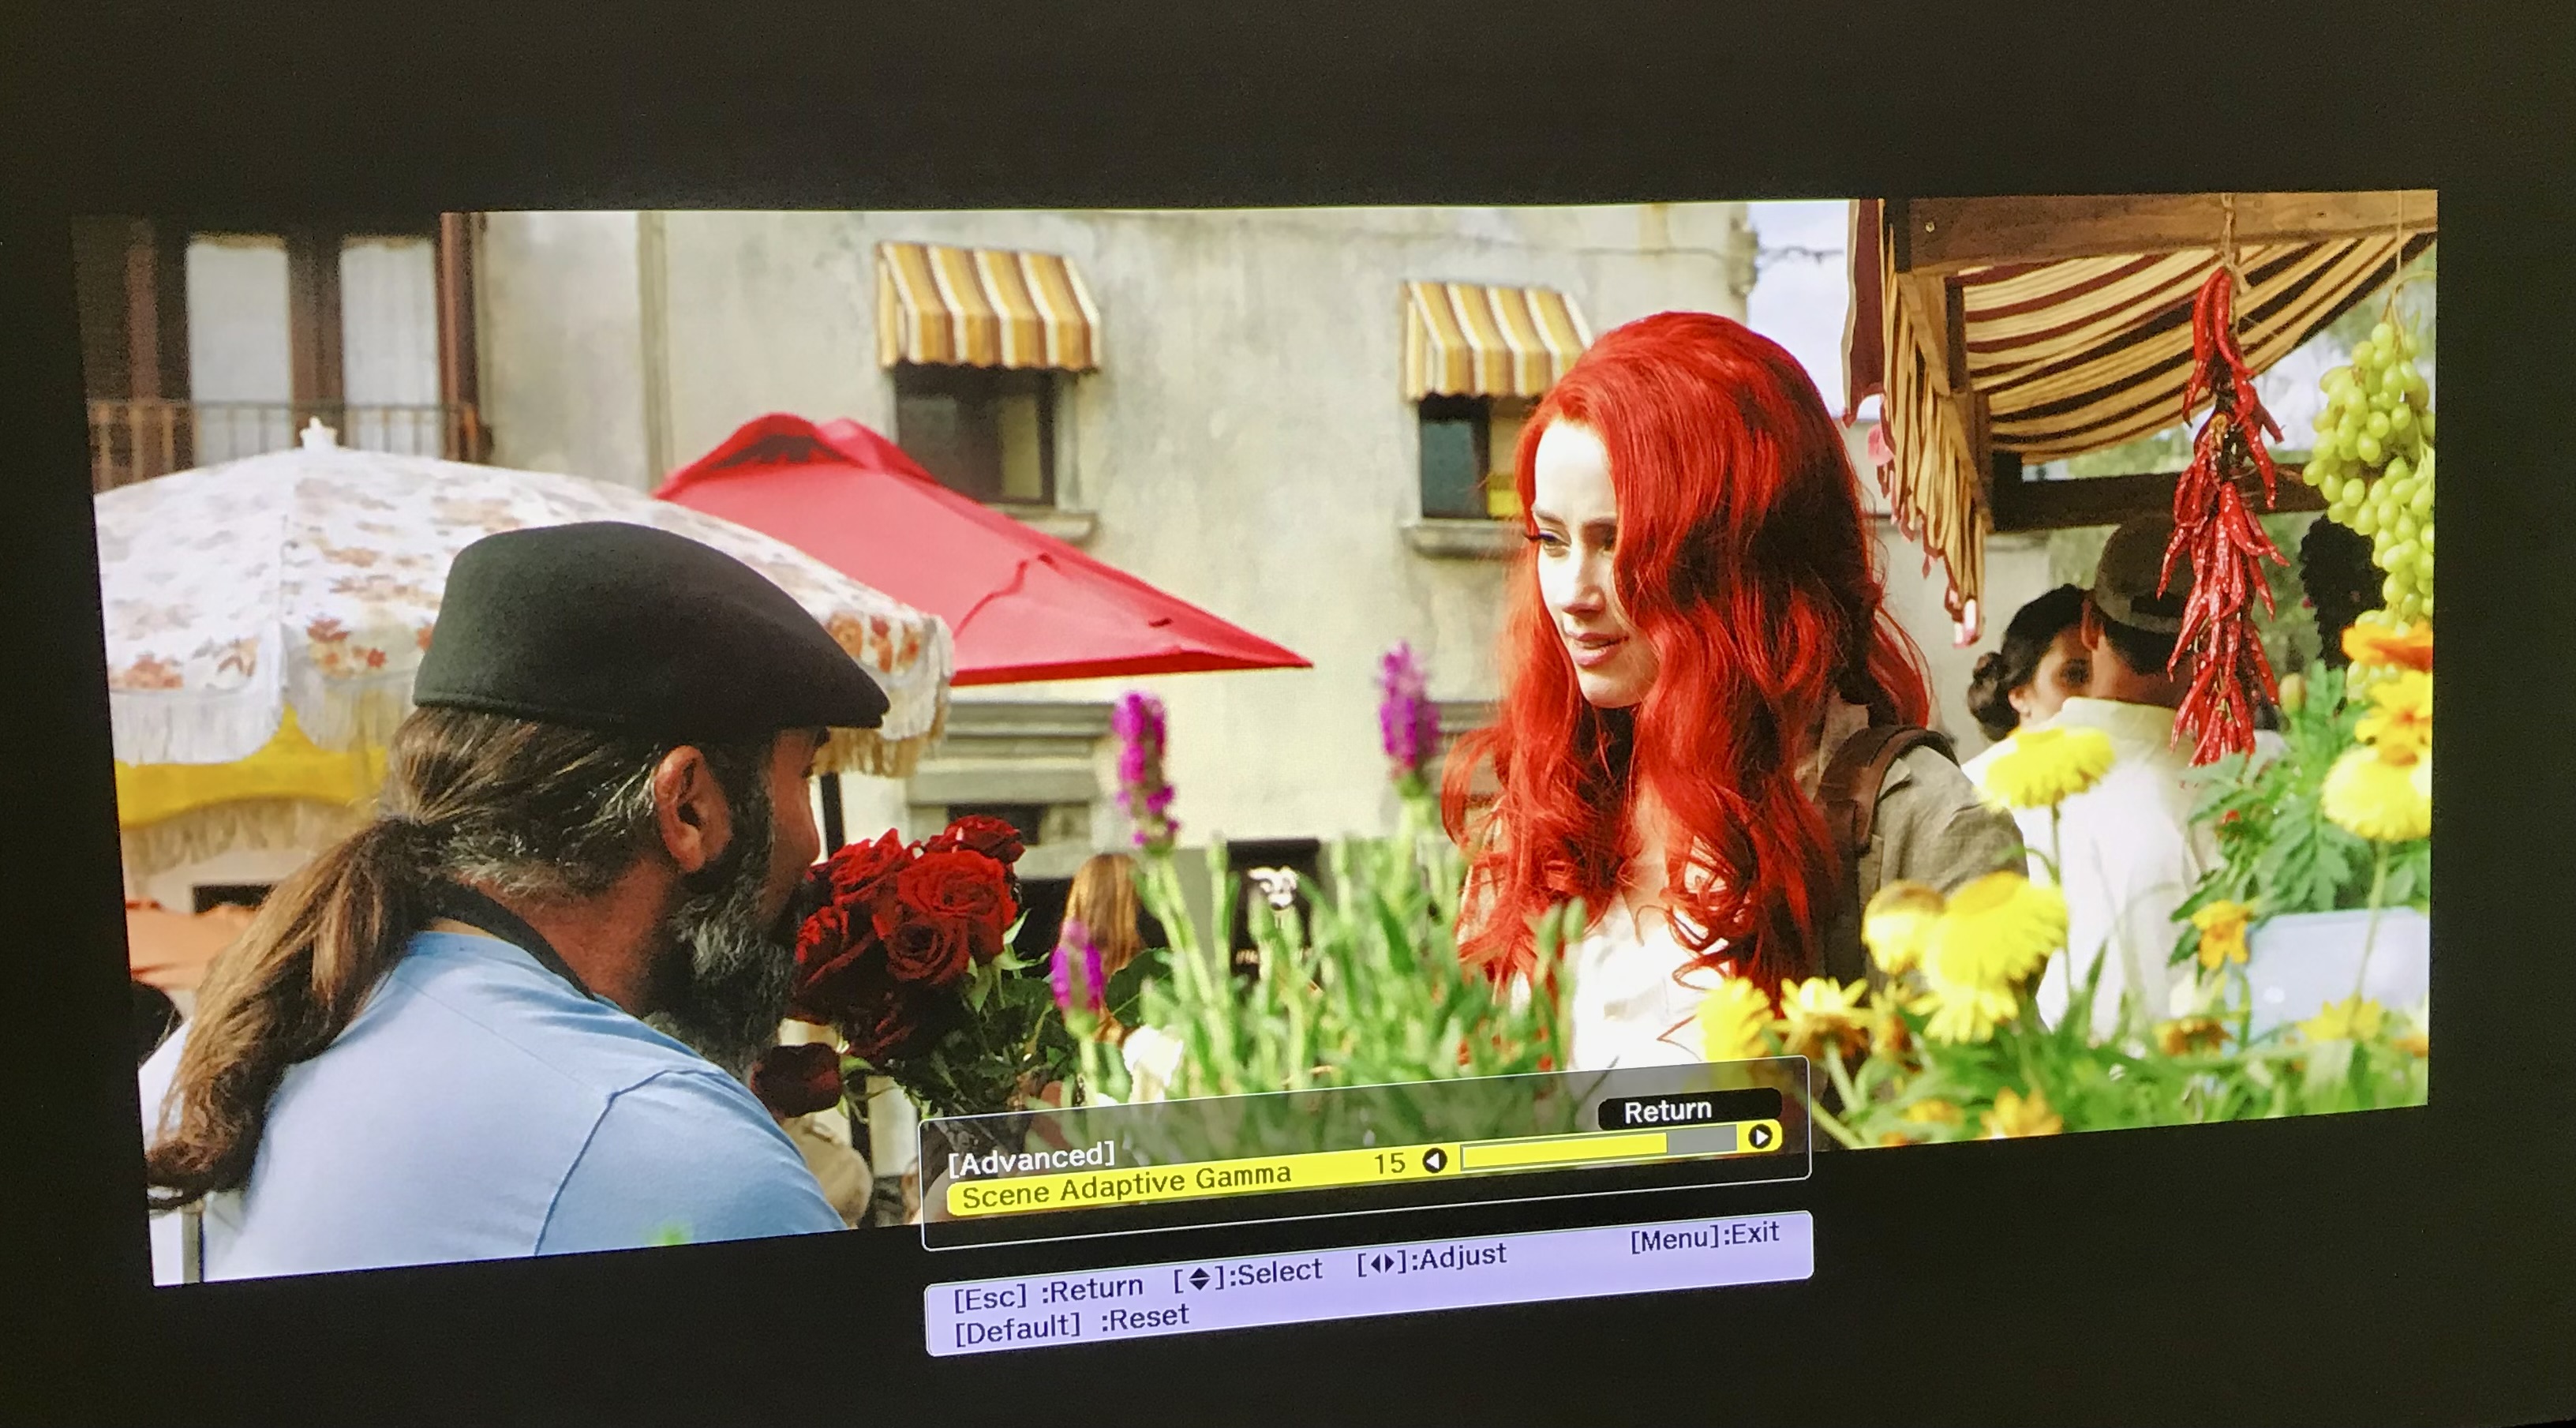
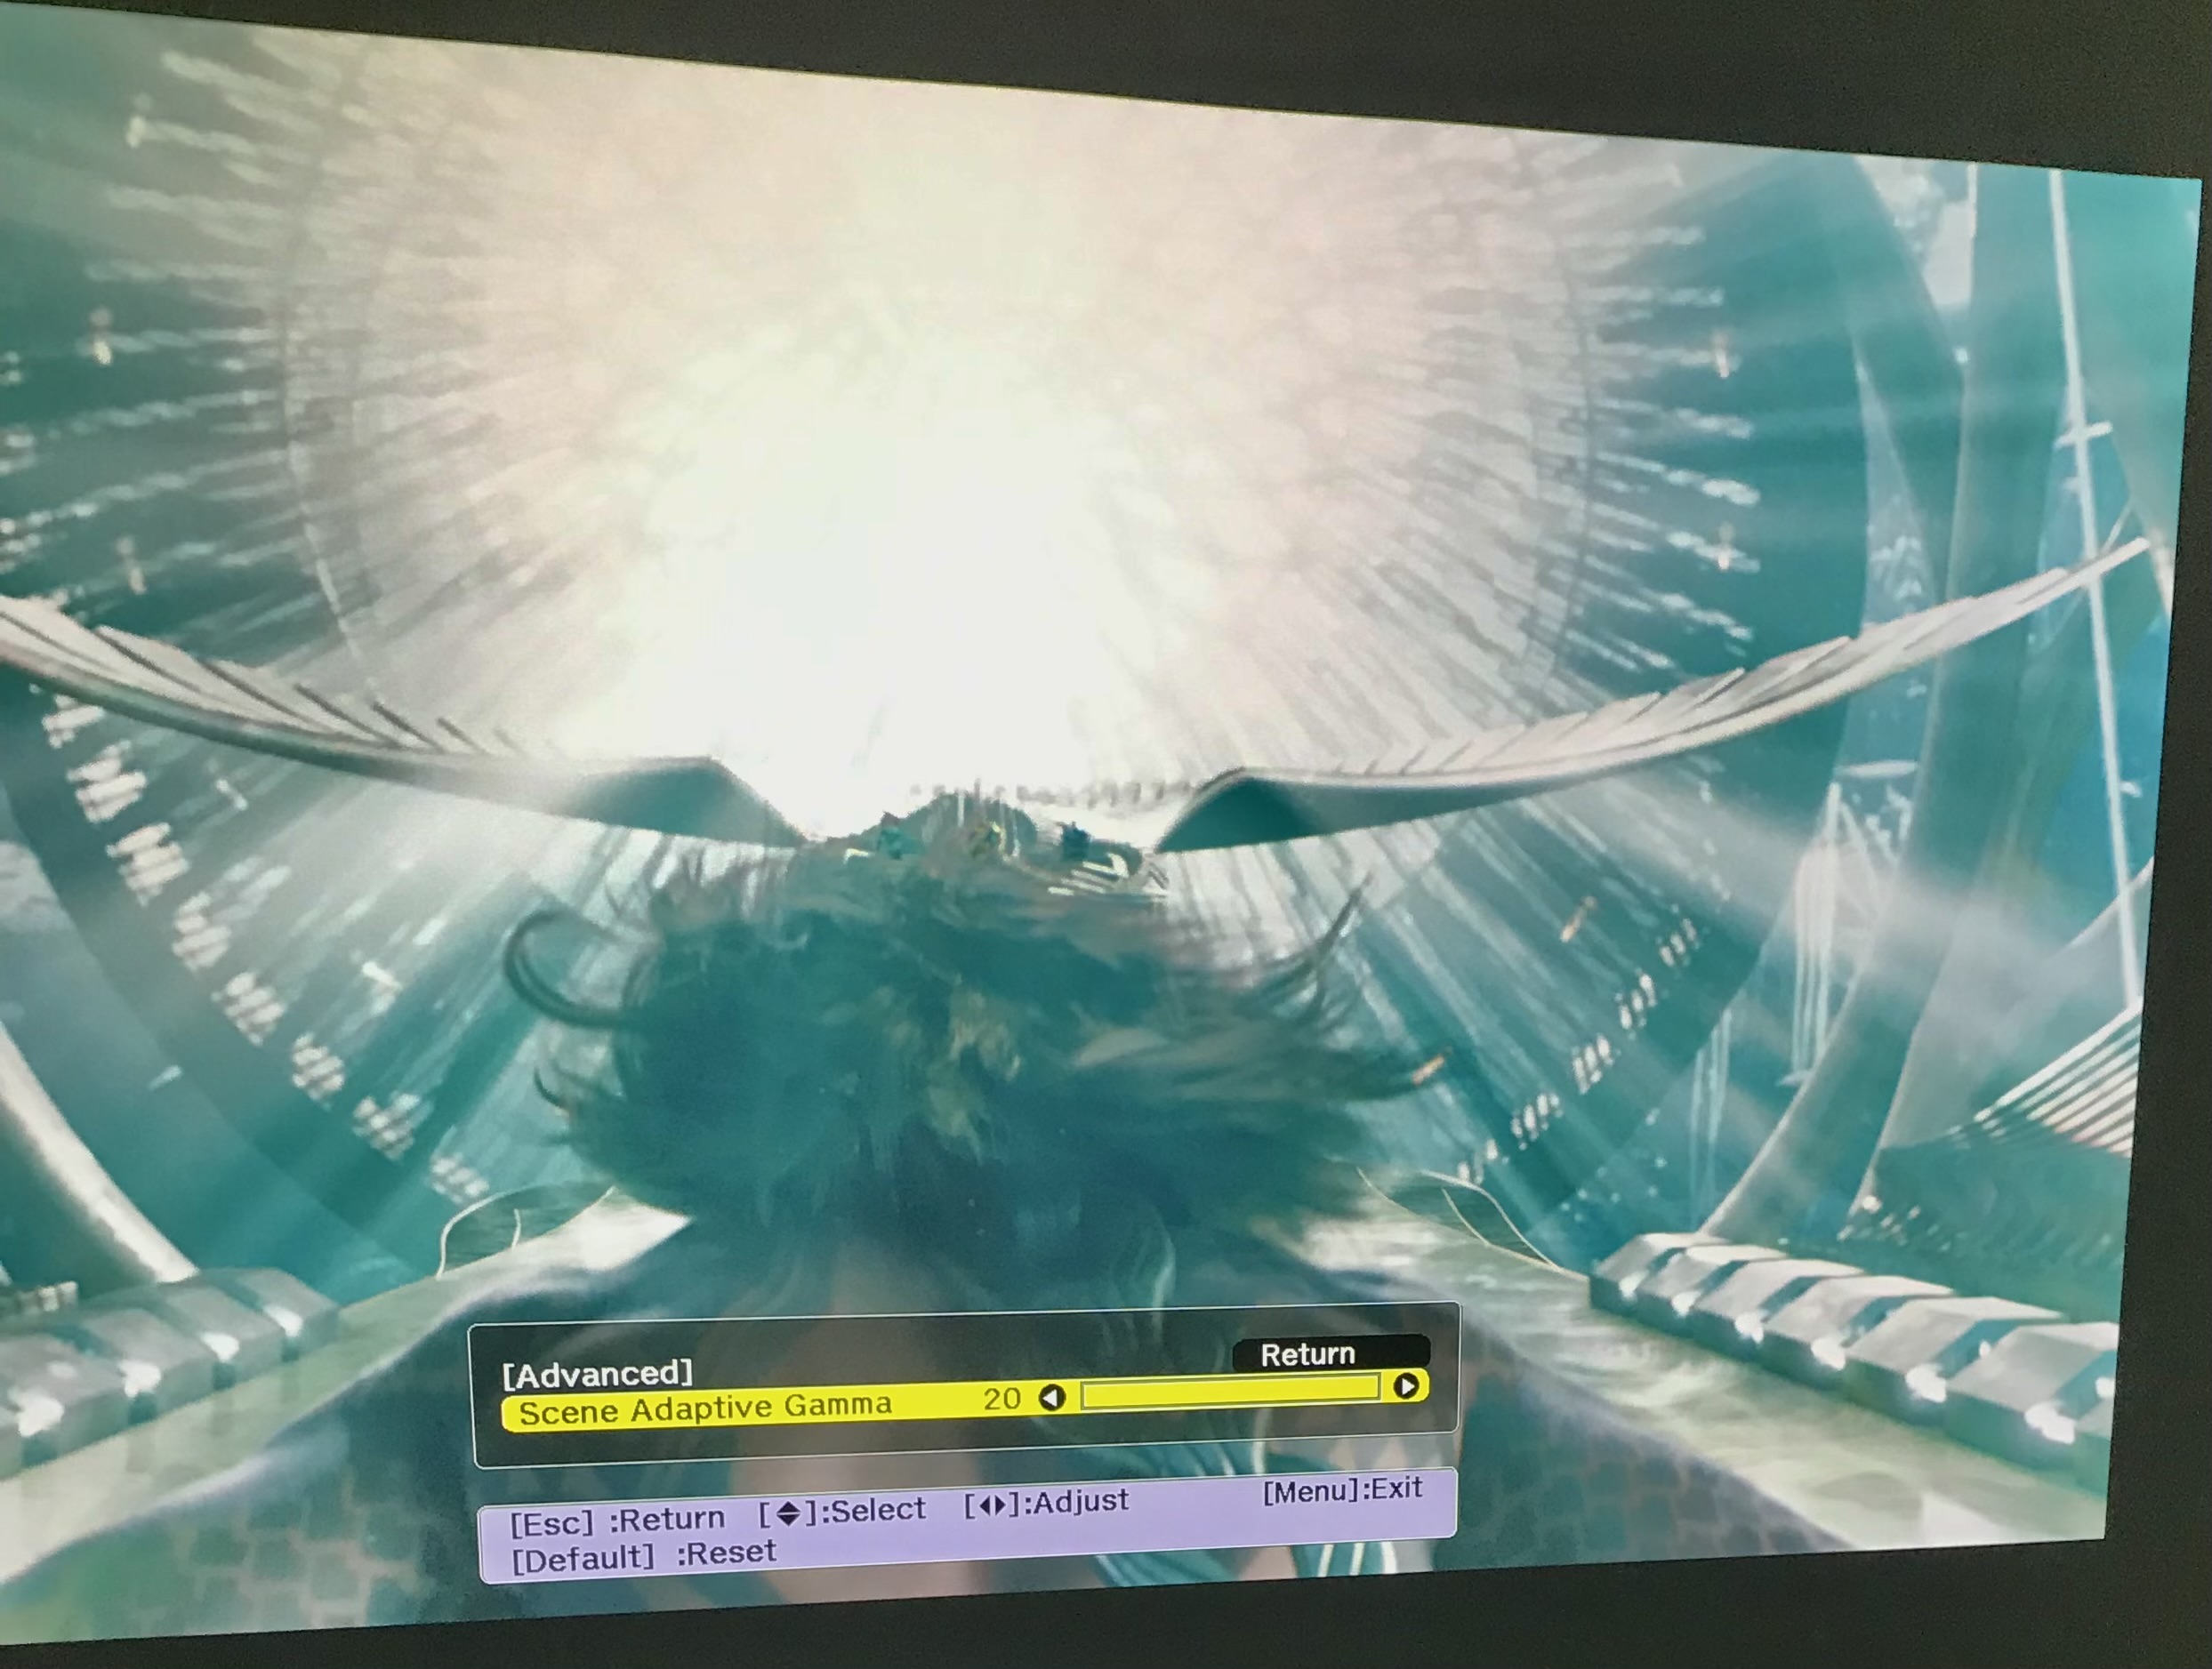
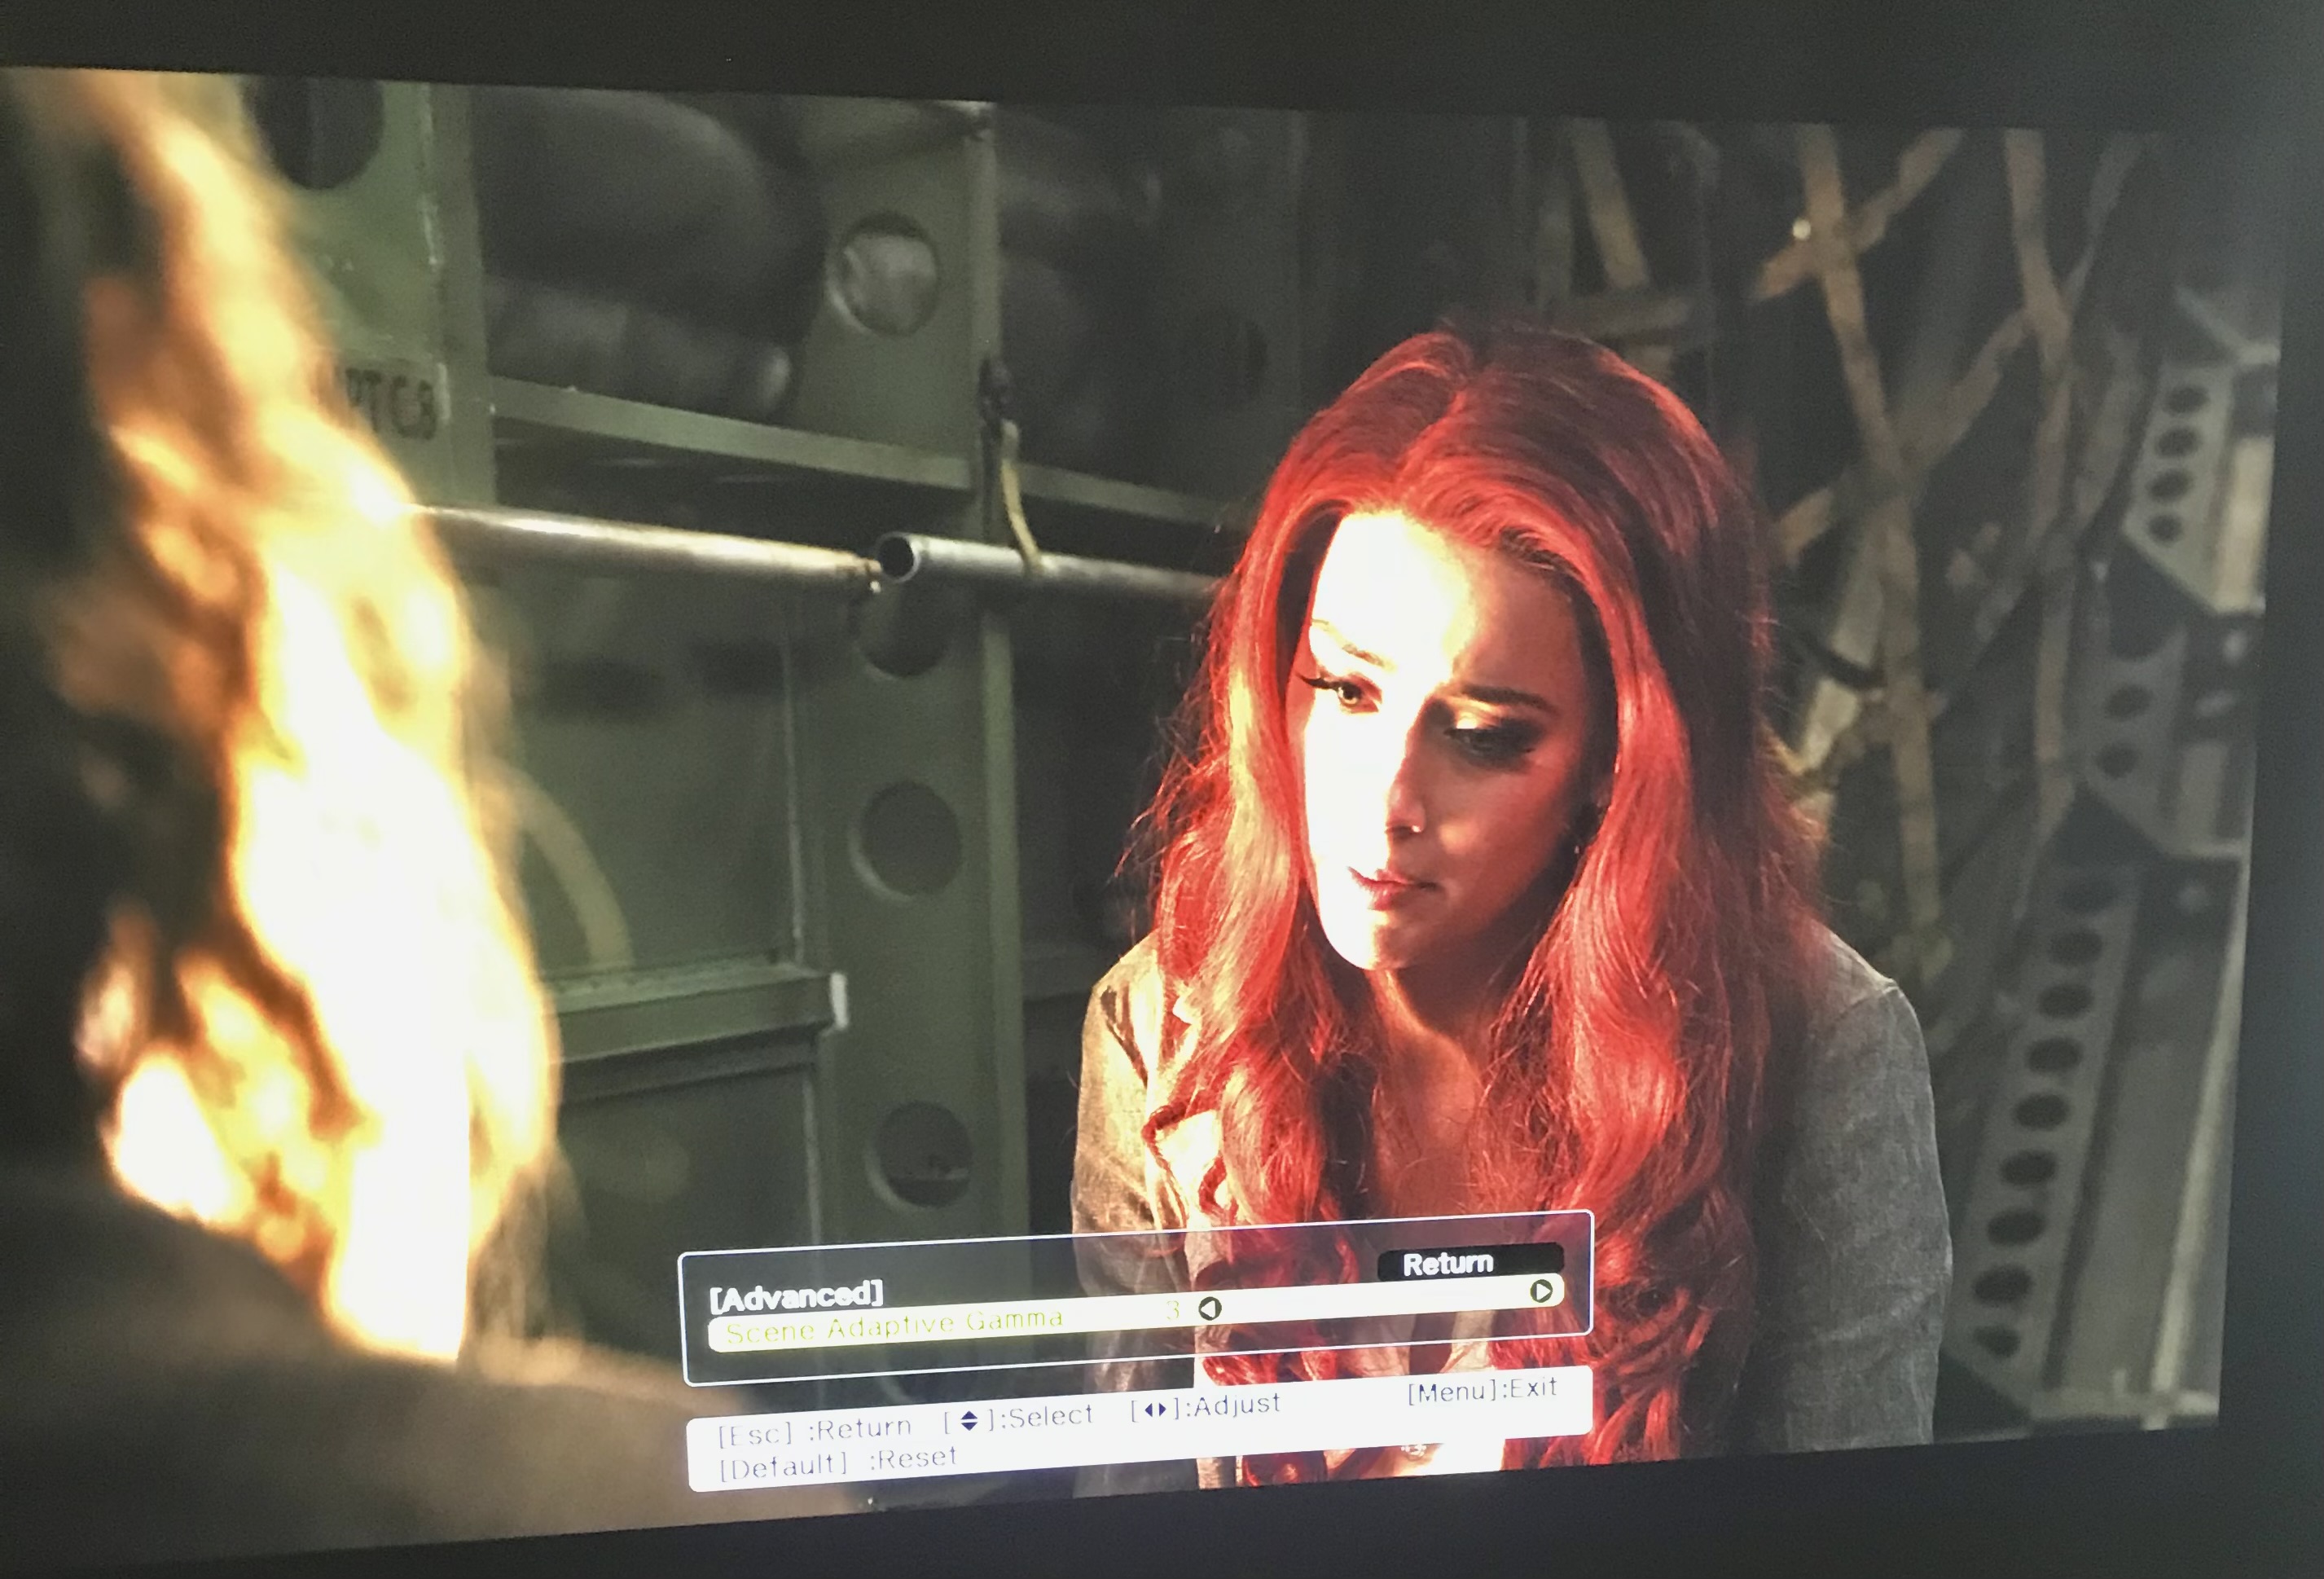
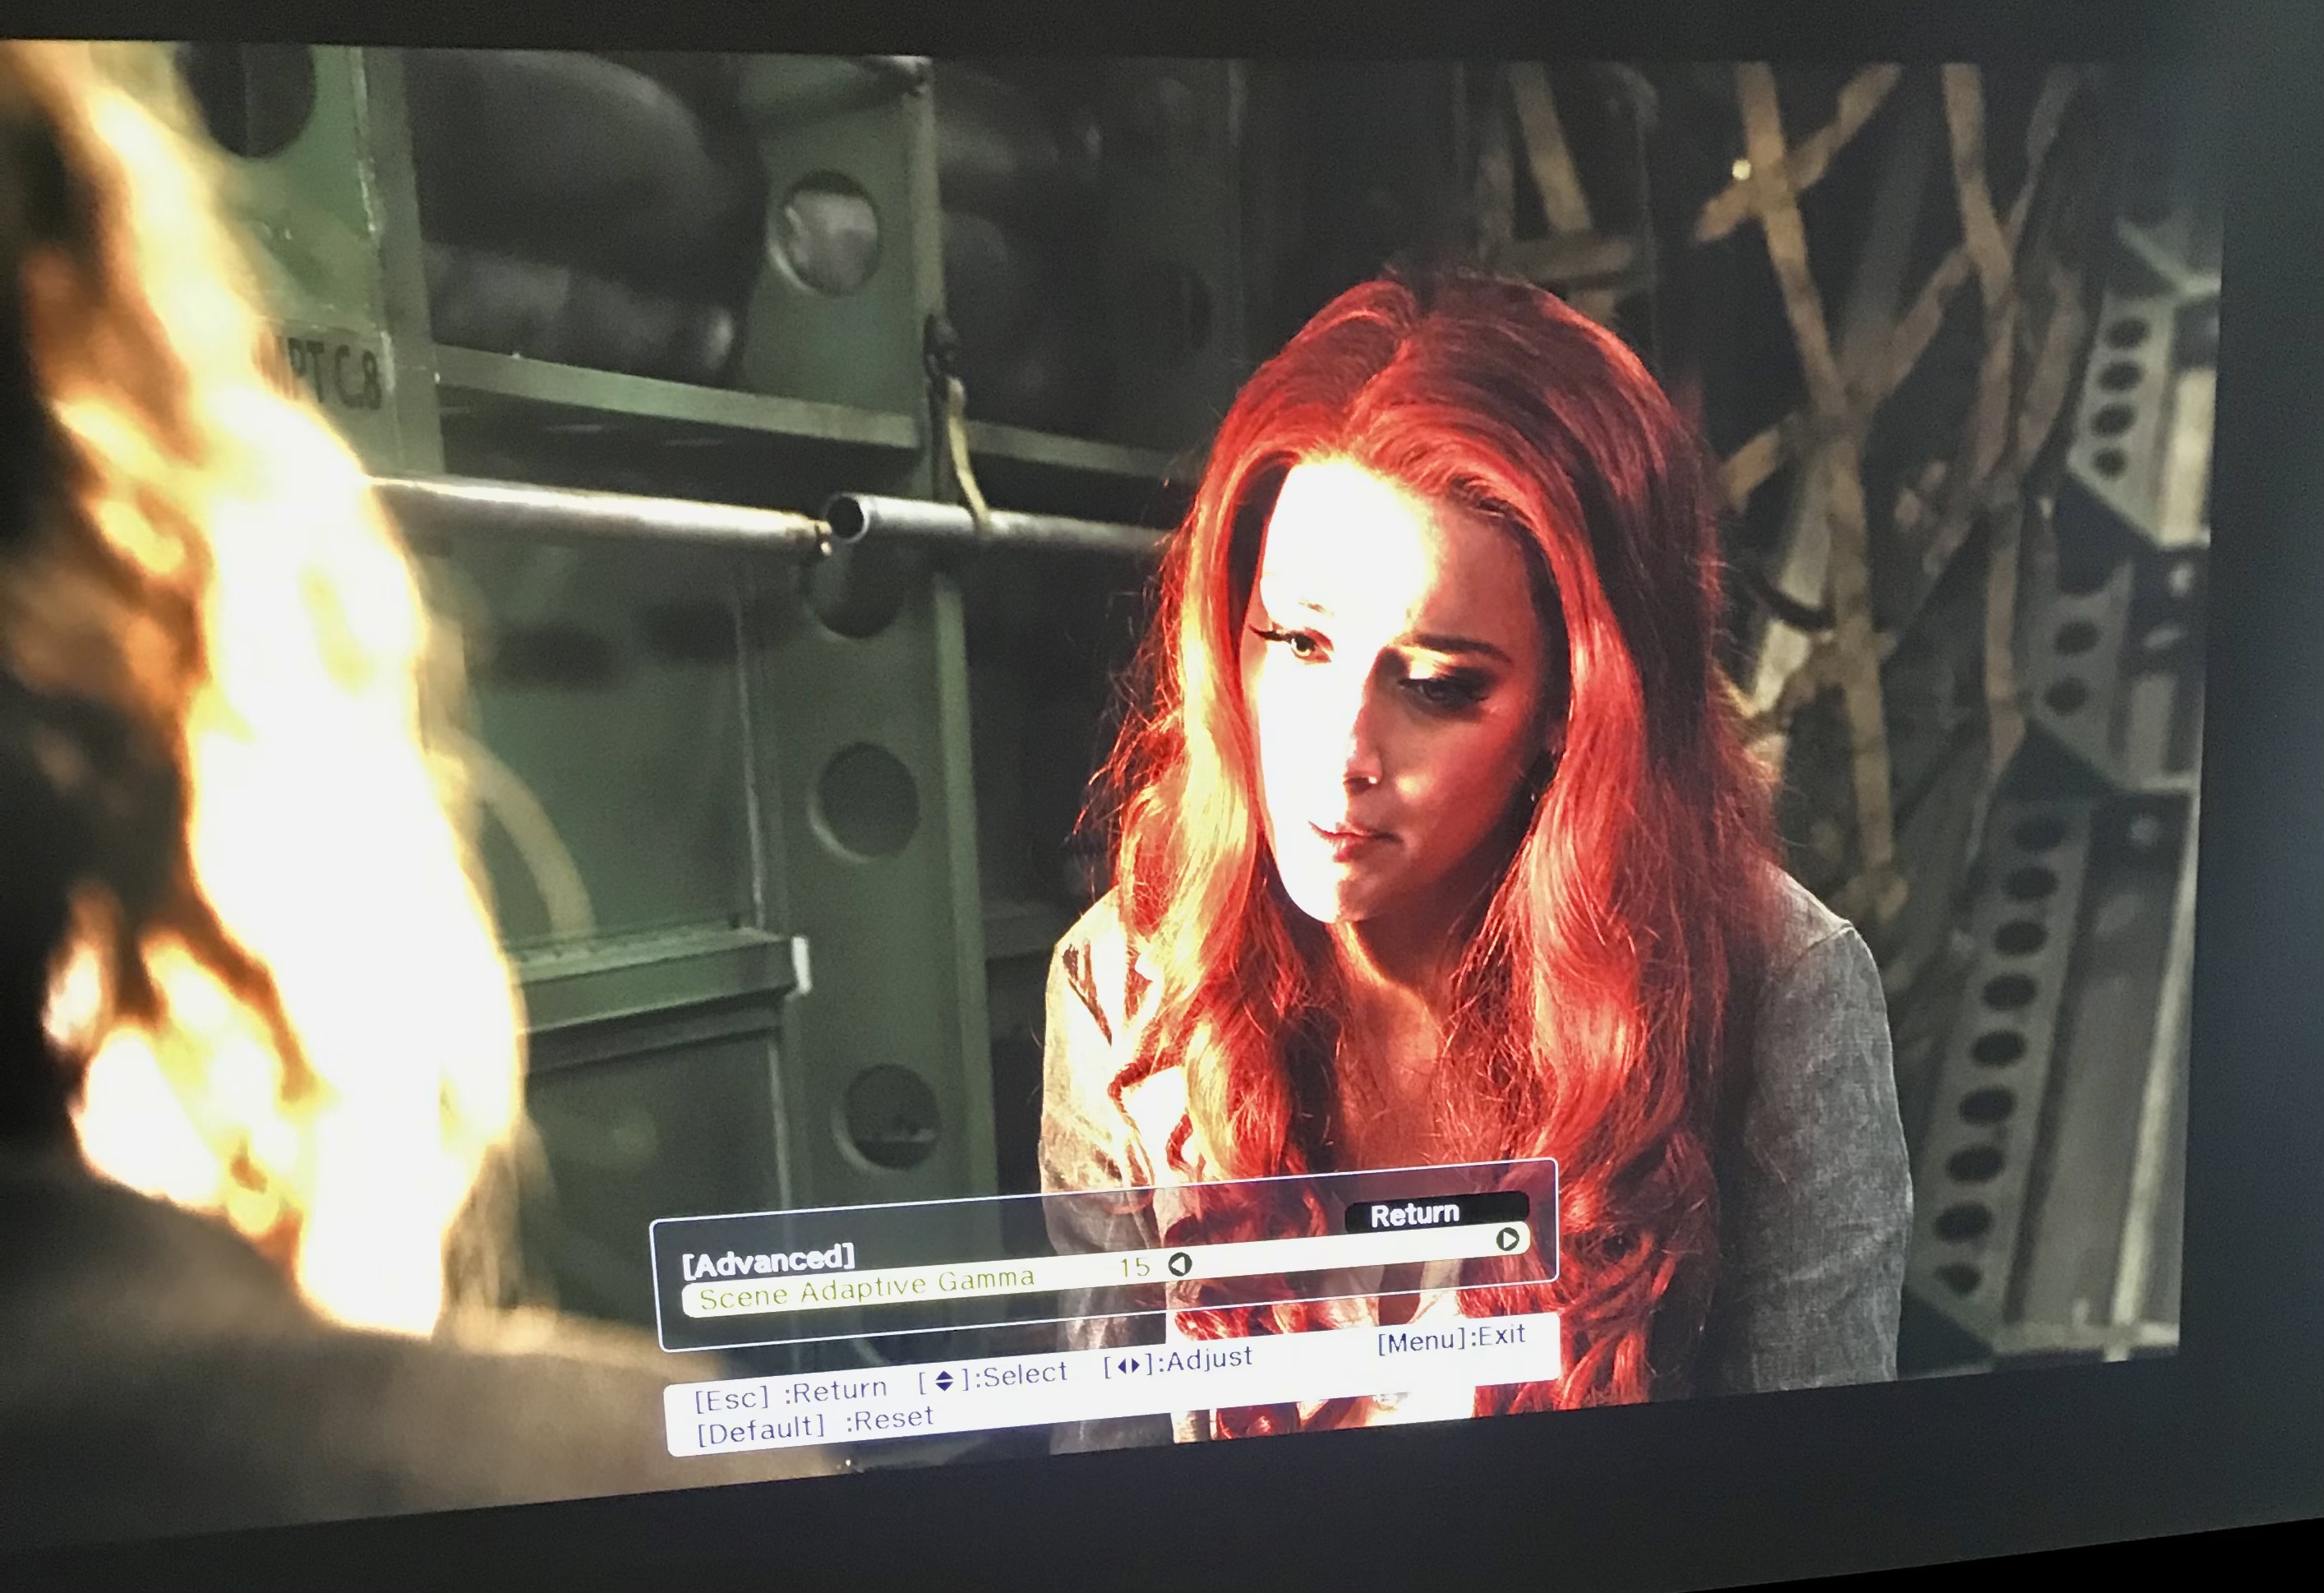
Scene Adaptive Gamma (SAG)
SAG is a new feature this year. It isn’t Sony’s Object-Based Remaster or JVC’s Dynamic Tone Mapping (DTM). However, the system is adapting the gamma based on the Average Picture Level (APL) in the scene.
I tested this feature on both dark and very bright scenes and in both cases, SAG improved the perception of contrast and brought out more detail in the dark or the bright areas of the scene.
For low APL scenes, the projector is trying to dedicate more of the luminance range to dark areas of the image and compress the highlights or brighter areas to do this.
For high APL scenes, the projector is trying to do the opposite: unwrap the detail within the bright areas of the image and bring back definition where there was just a bright mess before.
This seemed to work very well in Aquaman, where there are a few very bright scenes that are difficult to watch with the HDR slider at the lower end of the scale. Scene adaptive gamma balanced the scenes out where darker scenes were not crushed and neither were very bright scenes, regardless of HDR slider position. This definitely improved the contrast perception within the image and made everything a lot easier to watch even in a moderately lit room. Well done Epson! I am looking forward to seeing the LS12000 to see how it will help with its higher-contrast panels.
This was incredibly difficult to capture with my iPhone camera however, even with the iPhone set to HDR capture mode. The blowout you see on the images was not present in person. I saw more detail in all parts of the image, not less as I turned up SAG. But you get an idea about the perception of contrast through these images.
I didn’t capture the low-light scenes in Passengers as that was even more difficult to do with the ambient light in the room.

Dynamic Action / Laser Dimming
Laser dimming can be set to normal or high speed options. Additionally, fade to black can be set to full fade or a percentage of laser power – I believe it was 2.5% by default.
Pixel Shifting
The PU1008 has slightly larger panels than the TW9400 and the new LS12000 to accommodate the slightly different aspect ratio. However, the panels are also driven differently. As I was pixel peeping, I saw the panels flashing and pixel shifting at a slower rate than I see with my own TW9400.
If I could guess, I would say that the PU range is NOT using a dedicated pixel shifting processor and still a generation behind in TW9300 territory. However, this is only a guess.
The pixels in 4K mode were less defined and a little blurred which is what you would expect from the TW9300, but not from the TW9400. This of course will affect fine detail retrieval. What is more, the PU line does not seem to have 3x shifting, which was enabled by the separate pixel shifting chip on the TW9400 – and even there not officially so don’t tell Epson! It might have been a sneaky engineer enabling it on the TW9400 just because they could – maybe over their morning coffee?!
Image Processing
I feel this is the area where the PU1008 is starting to fall behind the home theatre focused TW9400. It kind of made me appreciate the technology and image processing that goes into Epson’s home theatre line-up. The image on the PU1008 was less refined, both in colour reproduction and in detail retrieval in a way that is not only due to pixel shifting. The colour processing didn’t quite reach the heights of the TW9400 and detail handling couldn’t quite retrieve the fine detail on faces, hair and even film grain which looked a bit more chunky than I am used to.
However, keeping this in perspective: the image was still hell of a lot better than I have seen from any large venue or business projector. In fact, while I was in front nit-picking the image and making mental notes out loud, I could have as well sat at the back marvelling how gorgeous the image looked and how much detail there was on the actors’ faces, hair, etc. This just goes to show that these projectors can go head to head with an optical print running at a local multiplex, even if they don’t quite reach the heights of our better-than-multiplex quality dedicated home cinema machines.
However, if someone were to pair this projector with a Lumagen, or MadVR, and bypass the internal image processing, it might well reach much higher in image quality.
Colour and HDR Handling
I wish we had time to run some measurements – better yet calibrate the unit – however we didn’t have the time. However, judging by eye on very familiar material, the PU1008 is shorter on green and red than the TW9400 without its P3 filter. However, where the PU1008 lacks in colour saturation, it makes up in colour luminance as colours can reach brightness levels much higher than with the home theatre range. This is perfectly fine for non-critical applications. However, I would really like to see Epson including a P3 filter with these laser projectors. The brightness is more than enough to reach full P3 saturations and still get around 3500-5000 lumens which would be perfect for transforming this projector for critical movie viewing in a dark room.
This is what I was alluding to when talking about general image quality: these projector are simply perfect for venues that want to transform their spaces for movie projection even if that isn’t the primary focus for the space. Slap in a P3 filter and we’re talking about full DCI movie projection – with higher resolution to boot. Heck, pull in the pixel shifting improvements from the TW9400 or better yet the LS12000 and you have a 4K cinema.
HDR Settings
The HDR slider works slightly differently on the PU line compared to the TW9400 in that it shows the nit level the unit is mapping to e.g. 150nits, 250nits, etc, as opposed to a number such as 1, 2, 3, 4 etc.
Otherwise, everything else seems to be the same.
Gamma can be set to 2.2, 2.3, 2.4, etc (as opposed to 0, -1, -2 on the TW9400) as well as having the ability to configure a custom gamma which you could do for getting the most out of HDR on this projector.
Conclusions
Epson’s PU line – while not quite ready for dedicated home cinema prime time – is certainly heading in the right direction. The brightness, great HDR playback and scene adaptive gamma work really well. If Epson could improve 4K pixel shifting and slap in a P3 filter, these units could easily be transformed into more critical movie viewing. As it stands, they are an excellent choice for mixed use where movies are a secondary consideration as the Epson could very well put up a great show regardless of content.
Display Calibration Guides
Want to calibrate your projector? Check out the Display Calibration Guide.
Discover more from Simple Home Cinema
Subscribe to get the latest posts sent to your email.
Leave a Reply